Hey, did you hear the news? I’ve relaunched the blog at divinedebris.com! I’ve already posted a new free pattern, the Citrus Barefoot Sandals. I also released a new pattern, the Izzy Hat pattern, which is now on sale for $1.75.
I don’t believe I’ll continue to maintain this blog, except for the occasional update on what I’ve updated on divinedebris.com. You can keep track of my blog on Twitter, Facebook and Instagram if you’re interested in following me still. I’ll also be creating an e-mailing list in the future, if you would like to sign up for that you can on divinedebris.com.
How are you doing on this lovely Saturday. Well, it’s Saturday here when
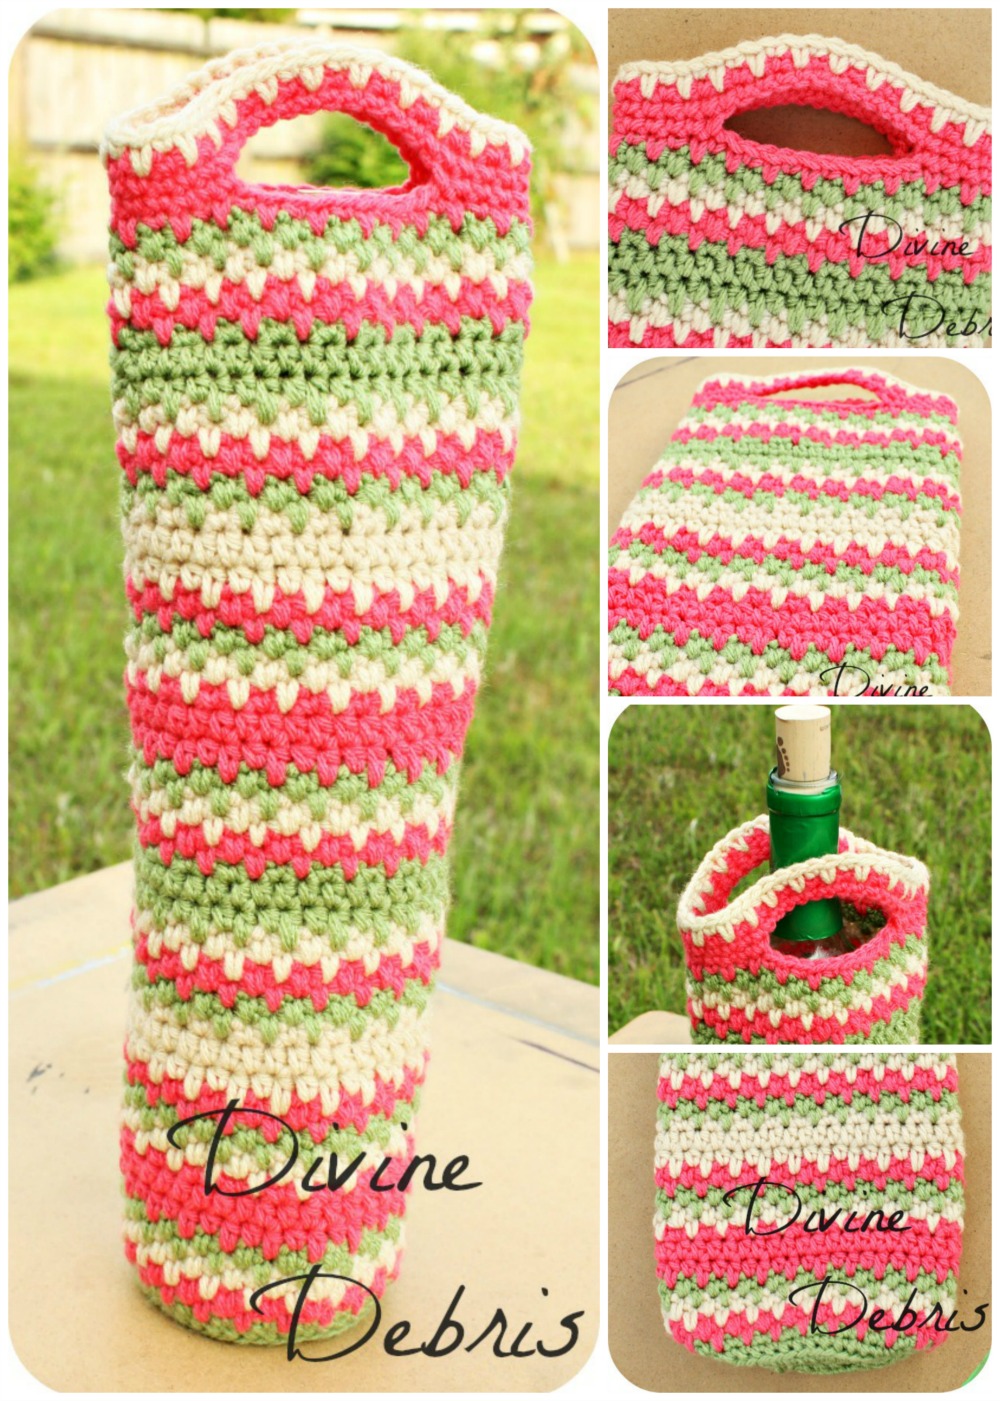
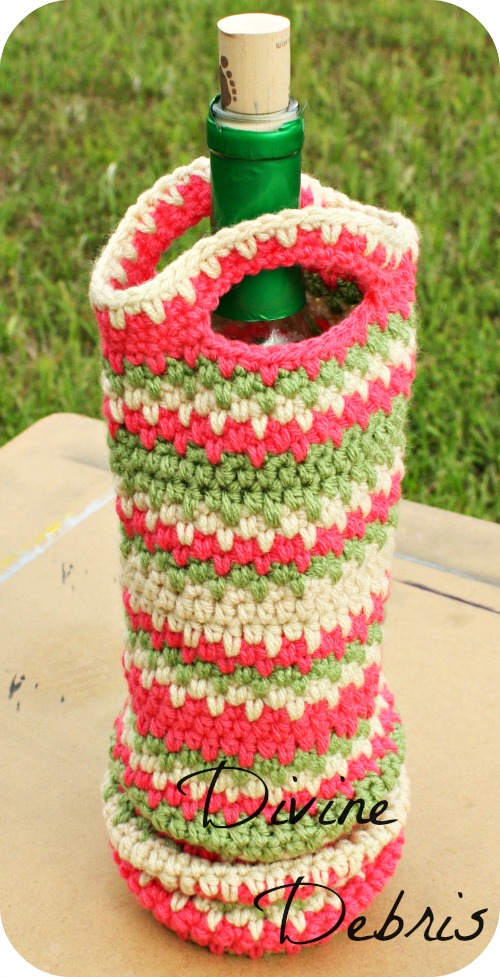
Willow Bottle Cozy Pattern by Divine Debris
I’m at but it might not be where you are. Either way, I hope which ever day it is where you are is delightful. Here I’m hoping to accomplish some much needed house work and get some patterns finished up as well as work on a new “secret” pattern that I’m not sure about still. Don’t you hate that? When you’re working on a pattern and you’re not entirely sure you like how it’s working up but you want to continue working on it? Because you won’t know if you’re happy about it or not until it’s done. That’s where I am at with this pattern I have floating around in my head.
I digress… I actually wrote this pattern up last week and had it all ready to go, but I didn’t have the pictures done. Sometimes the taking and editing of pictures takes me forever to get around to. Not because it takes so long, but because I won’t sit down and get to it. Also, the posting. I’m not consistent with the posting. I’m more content to sit and work up a pattern while watching Grey’s Anatomy reruns, all the other stuff is hard. Ok, not hard, but not as fun. :p
As the title says I’m expanding the Willow line some more, with a bottle cozy. I was inspired by other designers posting adorable pictures of their bottle cozies and I genuinely said, “I want to make one.” So I did. And you can too, it’s very easy.
Materials: *US G (4.25mm) crochet hook
* 1 – 2 oz worsted weight yarn
*3 different colors (although you can do more or less it’s entirely up to you) I used Loops and Threads Impeccable * Tapestry needle
Note: *If you would like to make this pattern taller, just keep adding rows before you get to the handles.
*You will need to know how to sc into the back loop only for this pattern.
*This pattern is written using 3 colors, listed below as colors A, B, and C. You can add more or fewer colors to this pattern if you would like.
*Instead of fastening off between color changes, you can just drop the yarn for the color you’re not longer using and pick it back up again when it comes time to use it. This will cut down on the amount of ends you will have to weave in, but the inside might not be as clean as some people would like. It’s your decision on this, I like to drop the yarn and pick it back up because I hate weaving in ends (unless it’s a gift and then I’ll clean it up).
*This pattern is worked from the bottom up. You complete the base and then move on to the cylindrical sides and then finish with the handles, all in one piece. This is done row by row with a slip st at the end of each row.
In April I made a purchase on a whim and bought a sampler pack of
Mae Shawl/ Wrap Pattern by Divine Debris
fingering weight yarn from Knit Picksand while the yarn was outstandingly beautiful, I could not figure out what to make with it. Do you ever have that problem? When you buy yarn without a specific project in mind? That’s pretty much what I do with all my yarn, but this yarn is so soft that I don’t want to use it on just anything. While I was visiting family in Texas I decided to make a nice airy shawl/ wrap but I couldn’t find a pattern that I wanted to do. After a few bad starts, I wrote up the Mae Shawl/ Wrap pattern. I’m so glad that I bought the yarn and forced myself to find/ create a pattern for it because I was at a loss for Summer patterns. Winter, Fall and Spring I can do, but Summer is very hard for me for when it comes to patterns. As I transition into full-time pattern and blog writing you’ll probably see more earring patterns from me, because they’ll be my “Summer” designs. Ha.
Anyway, this pattern is on sale for 50% off it’s regular price, currently $1.99, until
Mae Shawl/ Wrap Pattern by Divine Debris
May 27th in my Ravelry store. I’m also giving away the pattern to 5 people on my FB page.
In more awesome news, The Crochet Awards (here’s the FB for TCA)has been releasing their nominations for this quarter and guess what! I’m nominated! Twice! Sorry for all the exclamation marks but, wow, I’m so excited. One for Best Boot Cuffs 2015and another for Best Jewelry 2015. Honestly, I’m really honored by this and it makes me feel really good. Part of me has been a little discouraged lately about a great many things and a part of it is my crochet life. It’s just been hard lately and to have these nominations show up, it made me tear up a bit. I told my husband and he was also pretty happy for me.
So, that’s an update on me. I’ve got some more patterns going on in my head and hopefully I’ll have some good things for you in the next couple of weeks. Take care of yourself out there.
Diana hot pad/ pot holder pattern by Divine Debris
In April I won a giveaway from Salena Baca Crochet for a bag of mish-mash cotton yarn. This was super cool, as I’m not used to winning things all that often, but then I didn’t know at all what to do with all the cotton yarn. My first instinct was to make pot holders! I mean, of course you make pot holders when you have cotton yarn, right? So as soon as my brain when there I decided to write up a pot holder design, based on one of my most recent patterns, the Diana Cowl. For the hot pad I used a US G hook and for a pot holder I used a US I hook, because for a hot pad I want very little space between the stitches but for a pot holder that’s less important. Regardless, it’s the same pattern just a bit different – the hot pad requires more stitches to get to nearly the same size. Add it to your Ravelry here. Pin it here.
Diana hot pad/ pot holder pattern by Divine Debris
Pattern:
US G (4.25) or US I (5.50) crochet hook
1 – 1.5 oz cotton yarn
Tapestry needle
Diana hot pad/ pot holder pattern by Divine Debris
Notes:
This pattern is a easy to customize- add or subtract sts in groups of 2 to make it larger or smaller.
You will need to know how to work into the third loop of a hdc for this pattern.
Finished measurements: Hot pad: Height: 6.75″, Width: 6.75″ Pot holder: Height: 7.25″, Width: 7.25″
Diana hot pad/ pot holder pattern by Divine Debris
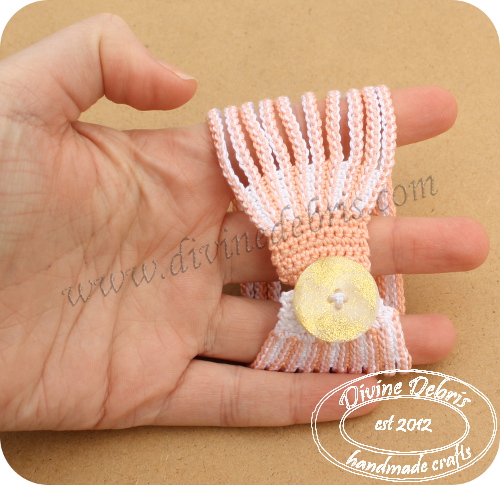
Leah Bracelet pattern- a free crochet pattern by Divine Debris
Hello! How are you doin’ on this lovely Thursday? I’m alright, multitasking. I’ve got my Chloe Cowl scarftesting, which seems to be going well and hopefully it’ll be out sometime next week. I’m finishin’ up my giveaway offerings for Mad Mad Me‘s rainbow themed giveaway- I’m giving a rainbow Leah bracelet, a bib rainbow necklace, which I’ve thought about writing the pattern up for but I’m not sure if I should, and a rainbowHeather headband. Also I’ve got a shawl/wrappattern I’m working on that will be ready to test soon. I have all the fun, right? Unfortunately, I’ve had a hard time shaking that post vacation thing, where I’m not ready to get moving and be productive. It’s been quite annoying, really. But I’ll be ok. It was a good vacation.
So, anyway, I designed the Leah bracelet last month and meant to post it as a free pattern some time ago, but I didn’t sit down and write out the pattern until I worked up the rainbow version for the giveaway, for the ones in the pictures here I just created ’em from memory. Actually, when I sat down to make the rainbow one I had to frog it, after it was finished, because I realized I did it wrong. Ha! It’s not a difficult pattern, you just need to be sure you’re working into the same stitches and keep an even tension throughout the chain into chain rows. It gives it great texture. I’m thinking about making a necklace, a headband and a scarf with this pattern. My mind is always going, I just wish I knew where.
And for the pattern:
Leah Bracelet pattern- a free crochet pattern by Divine Debris
Materials:
*2.25mm crochet hook
*Size 10 crochet thread (in as many or as few colors as you would like)
*1 or 2 buttons
*a needle for weaving in ends
Notes:
*This bracelet is worked in 3 parts. The first is the main body, which is composed of the sc & ch/slip st rows. The other two parts are on the ends of the main body, just scs into the ends of the sc rows.
*Try to maintain an even tension in the chain into chain sections, as too loose or too tight might be noticeable in the finished outcome- but that might not be a bad thing if you want the individual rows to have a lot of movement independent of each other row. You’re call, really.
Hello! How are you this fine Saturday? I’m actually on vacation, visiting family in Texas, but I needed to update this blog with the bunny ring that I made last week (which you may have already seen on Instagram or FB). Originally I was going to write this blog before I left but, alas, my time got away from me and that did not get done (not to mention that I found my motivation waning). Anyway, to continue with the ring posts that I made as of late (which you can find here), I wanted to make a ring for Easter. You could wear this ring in addition to the egg earrings I posted about a couple of years ago or even make your own applique from last year’s egg update. Actually, I was thinking that if you made it with worsted weight yarn, you’d have to figure out how many stitches to do, you could make your own little egg holder. How cute would that be? It’d be like a yarn version of one of these.
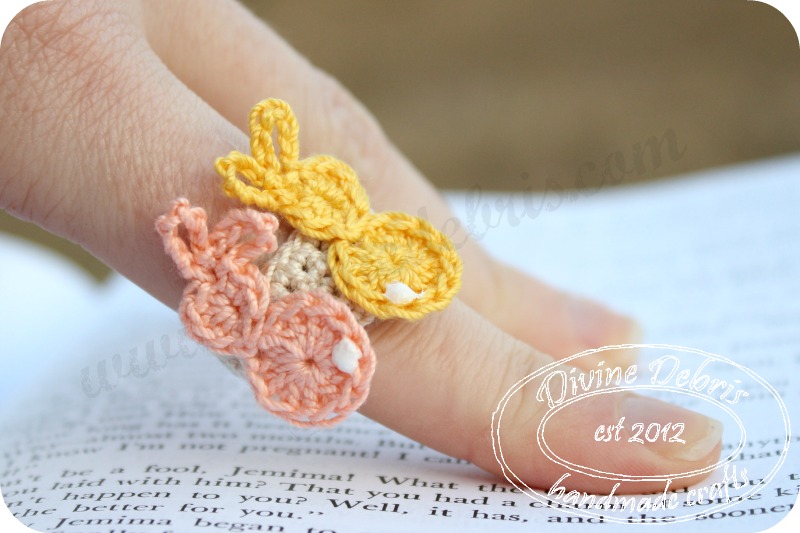
Bunny Ring Pattern by Divine Debris
Materials:
*US 2.25mm crochet hook
*US 2.20mm crochet hook
*Size 10 crochet thread
*Glue (fabric glue is what I used)
*Puffy paint (optional but makes creating a cute tail easy)
*Needle to weave in your ends
Final measurements:
*Individual bunnies around just over 1″ in height and .5″ in width
*The band is .5″ in height and just over 1.25″ in width when laid flat.
Bunny Ring Pattern by Divine Debris
Pattern:
For the bunny itself I used HodgePodge Crochet’s bunny applique pattern (it’s free!). Previously I had made some bunny stud earrings from another pattern I found online but HodgePodge Crochet’s pattern is far superior and the photos are helpful and you can make bunnies that sit back to back (as I did on my ring) without having to think about how to do that. 😀 Seriously, she takes all the guess work out of creating cute bunnies! The hardest part of this pattern might be how tiny and tight the stitches end up when you use the 2.20mm crochet hook. I wanted the band to be less of a tight fit so I used the basic band I’ve used in my Pumpkin and Heart rings.
The bunnies (using the 2.20mm hook): create two bunnies per the instructions on the HodgePodge Crochet pattern, you can do whatever colors you have on hand, and if you want you can make them back to back or facing the same side (crafters choice). If you wanted to use the 2.25mm hook for the bunnies it would be entirely fine, but the bunnies will end up later than you see in the photos.
Bunny Ring Pattern by Divine Debris
For the band (using 2.25mm hook): Row 1: Ch 25, slip st to form a ring, sc into each st around, slip st into first sc to secure – 25 scs Rows 2 – 5: Ch 1, sc into each st around, slip st into first st to secure – 25 scs
Fasten off, weave in ends.
Honestly, I think I should have made the band green, which would have worked for the Easter theme of the ring. A neon green would have looked rather adorable, if you ask me, because it would evoke thoughts of that bright green grass that you so often find in kids’ Easter baskets, or at least I did when I was a young-in. After all your ends have been woven in, use the puffy paint to create little fluffy tails. You don’t have to do this if you don’t want to, you could glue a bit of yarn or something too and achieve the same effect. Once the puffy paint (or whatever you used to create the tail) has dried, glue the bunnies to the band. I always use fabric glue when I glue appliques and such onto ring bands, because I have found glues like Super Glue can discolor the thread when used. Just let everything dry and enjoy your new ring! Oh, and if you use the pattern to make an egg holder, let me know in the comments how it turns out.
Leah bracelet by Divine Debris
So, there you have it! A super easy, and I say adorable, crochet bunny ring. Honestly, the bunny pattern by HodgePodge Crochet is so useful, you could make bunnies by the pound with no problems at all. I’m going to go and enjoy the first day of my vacation that isn’t going to be spent in a car (we drove down here) and I will be back, probably next week some time, to bring you the pattern for my Leah bracelet (on the right).
Take care! Oh, and if you have any ideas on what sort of patterns you’d like to see me post here, just leave a comment and I’ll see what I can do. 😀
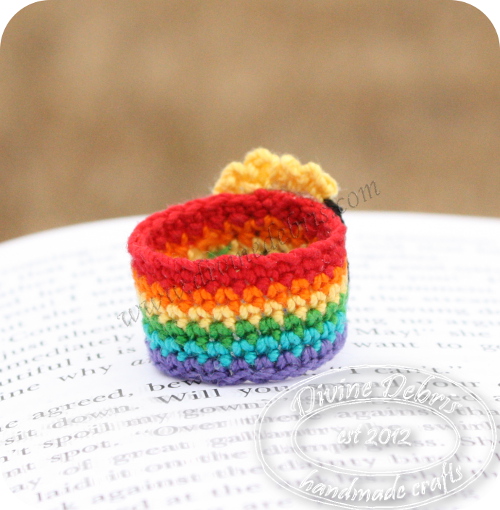
Hello! I know that on my last post I said that I was going to update this blog here with a pattern for a pot of gold ring,
Pot of Gold/Rainbow ring by Divine Debris
just in time for St. Pat’s Day, and here I am, squeeking in before the day itself. Ha. Actually, I’ve been wanting to do a lot more when it comes to crochet lately but I’ve had some problems with motivation and depression. I’m just going to try to keep my chin up and continue moving forward. In fact, I’m going on a vacation at the end of this month to go visit some family and I think that’s going to help. 🙂
Not that you’ve got past all the yada yada that I was throwing out there, do you still want the pot of gold ring? 😀
I made this pot of gold ring and placed it on top of a rainbow ring base because I thought it would look adorable (side note: I was right :p). You can definitely use whatever colors you would like and perhaps even make this with worsted weight yarn and a size G hook and make it a larger applique. Again, check out this link on how to change colors in the round to help with your seam if you are worried with that.
Pot of Gold/Rainbow ring by Divine Debris
Materials:
Size 10 crochet thread
2.25 mm crochet hook
glue
a needle to weave in your ends
Update: You can download this pdf here. So, I’ve been having tons of fun with super fine yarn, mostly because it’s light weight and
looks so delicate when worked up (like my Imogene hat). However, because the weather here took a very cold turn, I pulled out some heavier weight yarn and made another nice close fitting cowl. You may have already seen this picture on Instagram.
Introducing the Diana Cowl:
It’s super simple, you may love it, especially if you like textured scarves. I used Vanna’s Choice for this but you could also use a worsted weight yarn for this as well. 😀 I’m sure it’d be lovely.
Diana Cowl, a free pattern, by Divine Debris
Materials:
US J ( mm) crochet hook
3 – 3.5 oz medium weight yarn
Tapestry needle
Notes:
-You will need to know how to work into the third loop of the hdc.
-The ch 1 on the beginning of the hdc rows does not count as a stitch and helps to keep the seam from traveling.
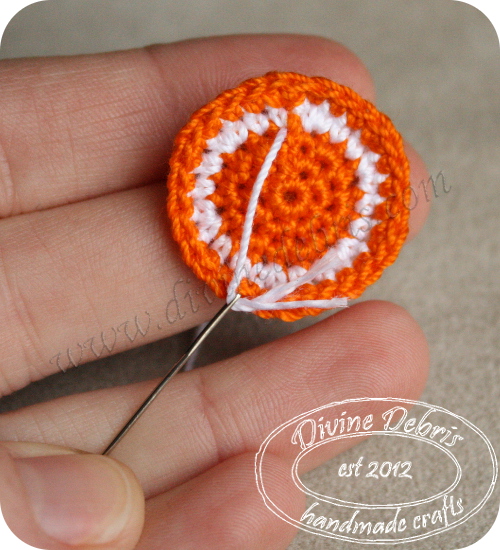
So a couple of weeks ago I was talking with a friend about what to do with the bright orange crochet thread we both have bought. I used mine to make my pumpkin ring and earrings but I honestly really haven’t had much call for it since Halloween / the Fall ended. However, as I was telling my friend, as I laid in bed listening to my husband snore ( it’s not a secret although he might not care for me to share it with the internet) I had an idea about how to use the orange thread before Halloween rolled back around. Citrus fruit! Specifically, make items that look like slices of an orange. Wouldn’t that be super cute? I thought so as I tried to fall asleep and I hoped I would remember when I woke up in the morning.
I did and the first thing I decided to experiment with is making another crochet ring. As you know I do love making crochet rings, I’ve made a Willow version, a Brittany and a heart in addition to my pumpkin ring mentioned earlier, so this was very natural and simple to think of. To make one of your own you’re going to need orange size 10 crochet thread, white size 10 crochet thread, a 2.25 mm crochet hook, and a needle that is big enough for you to weave the thread with. You may also want another color for the band for your ring, I used green this time in a departure from my heart and pumpkin rings.
Before you begin you might want to jump over and look at Needle Noodles’ tutorial on how to change colors in the round without making it look all icky. I must admit I’m not great at changing colors in the round and not making it look terrible, but this tutorial has helped a lot.
For the band I crocheted 25 sts and slip stitched the last st into the first to create a ring:
Orange crochet ring pattern by Divine Debris
Rows 1 – 4 or 5: (you can make the band as tall as you would like) ch 1, sc into each st around, slip st into the beginning sc to secure – 25 scs For the orange: Row 1: Create a magic circle: ch 1, sc six times into the circle, slip st into the first sc to secure- 6 scs Row 2: Ch 1, sc twice into the same st as join and into each st around, slip st into the first sc to secure – 12 scs Row 3: Ch 1, sc twice into the same st as join, sc into the next st, *sc twice into the next st, sc twice into the next st,* repeat from * to * until the end of the row, slip st into the first sc to secure – 18 scs Change to white thread: Row 4: Ch 1, sc twice into the same st as join, sc once into the next 2 sts, *sc twice into the next st, sc once into the next 2 sts,* repeat from * to * the rest of the way around, slip st into the first sc to secure – 24 scs (fasten off with this color) Change to orange thread: Row 5: Ch 1, sc once into the same st as join and into the next 2 sts, sc twice into the next st, * sc into the next 3 sts, sc twice into the next st,* repeat from * to * the rest of the way around, slip st into the first sc to secure – 30 scs (fasten off with this color) *Note: You could just do a sc row around row 5 if you would like, this will make your final product look more round but it might make the edges curl a bit. Your choice.
Details:
I didn’t measure the white piece of thread I used before I added the details on the ring, however I would say it’s was about 3″ – 4″, it’s better to have it too long than to have it too short. To create
the orange sections, so to speak, you want to start on the back side (the opposite side of the one that has been facing you as you’ve created your orange), bring your threaded needle through the first sc from the seam on row 3, then go through the center of the of the magic circle, skip 2 sts on row 3 and draw your needle through the next st on row 3 and then through the center of the magic circle again. You’re going to
continue this pattern the rest of the way around your orange. You are going to want to pull the thread tight enough that it doesn’t sag but not so tight that it distorts your orange. Don’t worry about them
moving because when you weave in the end from the magic circle it will hold the thread pieces in place in the center. When you get all the way around your orange you will come back through the same stitch you began in, the first one of row 3. Weave in your ends following this.
To secure the orange to the band I just used Fabri-Tac but you can sew them or use a glue you’re sure won’t change the color of the thread- I’ve had super glue change thread color before so I wouldn’t recommend it here.
So, tada! There you go. I hope you like this little ring. I’ve got a couple more citrus based ideas that I’m going to work up in the future and get back to you. You can add this pattern to your Ravelry queue/favorites here or Pin it here.
As always, take care and I will chat at you another day.
So earlier this week I posted about my experiences with wool dryer ball creation, which I love by
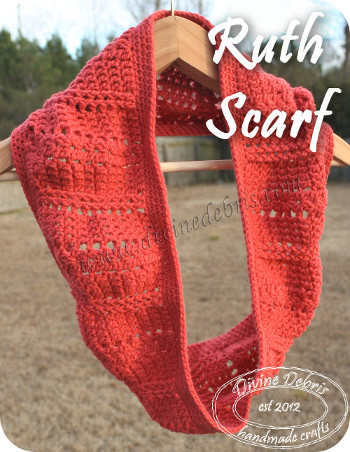
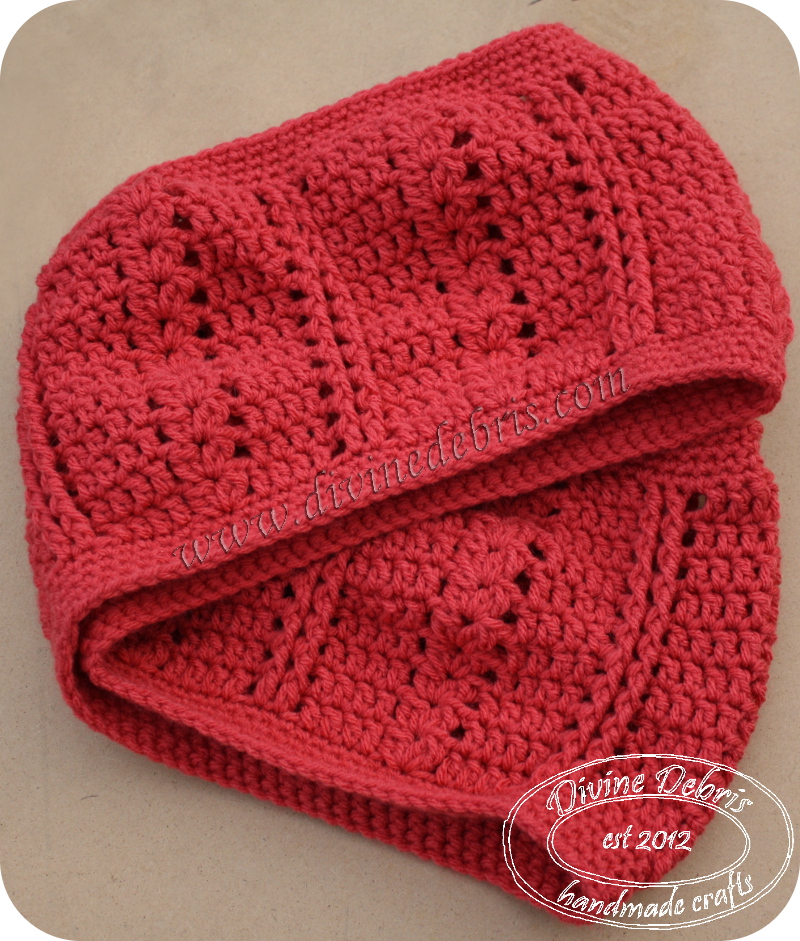
Ruth Scarf pattern by Divine Debris
the way. Well, now I’m back to tell you about the newest pattern I released, the Ruth Scarf.
It’s a really simple scarf that had a lot of texture; it’s also a lot of fun if you ask me.
Now, because this scarf is so simple and I designed it to be long but it’s not quite long enough to be a true infinity scarf and not short enough to be a cowl scarf, I included the multiple information in the pattern. This way you can pretty much do up this scarf as you would like. In short, this scarf is here for you to do adjust as you would like and make unique each time you create it. 😀
Ruth Scarf Pattern by Divine Debris
Also to celebrate that the Ruth Scarf is released, the Ruth Hat is on sale for $2.10 as well.
I also wanted to use this post to talk about how I’m not sure I know what else to do with my little crocheting endeavor. I’m not sure I’m all that good that this, perhaps it’s just how I’ve been feeling down lately. I just don’t know what to do. I don’t know where to go next. Ugh~ I just don’t know what’s going on in my head at the moment. I want to get better at this, some how. If you have any suggestions on what to do, I would very much love to hear them. 😀 Because I just feel like a jumble of no ideas and
Ruth Scarf pattern by Divine Debris
insecurities. Some weeks I think about giving up and then I don’t want to and it all goes around.